Translate

Monday, November 24, 2014

Collage Crazy

I hope everyone is busy getting ready for the holidays.  Time spent with family and friends are a precious gift.  I know I've been very blessed, and I hope the same is true for all of you!  I've been very busy with collages lately.  Their one of my favorite things to do.  I just get such a kick out of making something so beautiful out of a plain blank canvas.  Sometimes you don't want to try to create for fear that you will mess it up.  I say, go for it!  Sometimes some of my best creations were because of a mistake I made.  It seems to come out so much better than it would have if I didn't make that mistake.

This collage is one that I had a blast creating.  The doll pattern is from the website of GabriellePollacco.blogspot.com.  Her work is so amazing, and she has some great videos on You Tube for inspiration as well.  I hope you all enjoy my collage, and continue to do some happy crafting!!!!   Happy Holidays!!!!


Monday, November 10, 2014

Art Show

Wow, do I have exciting news to share.  I know it's been quite awhile, but I really have a good excuse.  I've been working on some new pieces to enter into a art show.  Every year I submit my collages, and I've been lucky to win first place for the last two years.  This year I entered three pieces. One of them is this beautiful collage, which includes one of Julie Nutting's stamps made by Prima.


This collage won first prize!!!!  How exciting is that?  The animal chipboard pieces are by Claudine Hellmouth.  Aren't they adorble!  Then I won second and third prize for my other two collages.   I already posted the second place collage in an earlier post.  Here is the second place collage:


I'll share the third place collage in a future post.  So you see I really had a good excuse for not posting in quite awhile.  I'm busy working on Christmas ornaments right now.  I'll be posting more on these in a later post.  I hope you all enjoyed my fantastic news.  It just goes to show that you should stretch beyond your comfort zone.  I never thought I'd win, let alone first, second and third place!  Now I'm hoping to send more of my work to some magazines to see about getting published.  Cross your fingers and wish me luck!  Happy crafting!!!


Friday, October 3, 2014

Ballerina Bliss

Hello Everyone!  Hopefully you all survived the first days of school.  My kids are all grown, but I remember the stress of trying to get everything done before the beginning of school.  Luckily, now I have time to do lots of crafting.  Today I wanted to show all of you a card that I made for my daughters birthday a couple of years ago.  I'm not sure of the manufacture of the paper with the ballerina design. It could possibly be by Melissa Frances.   I embossed the top of the cardstock with my Cuttlebug machine. I then took white chalk ink and rubbed it over the embossing.  It helps to pop out the design.  I applied lace to the edge of the cardstock.  Then I added some Recollections bling on top of the lace, and on the left side with some swirly bling.  The very last thing is to add the white ribbon.  I love this card.  It's so feminine.  I hope you all like it as well.


This card is an example of using the beautiful papers that already have designs on them.  It saves a lot of time and trouble of trying to match up the papers.  Give it a try, and let me know what you've come up with.  Happy crafting!!!!!!

Thursday, September 18, 2014

Time seems to have gotten by me again.  Today I thought I'd share two projects with all of you.  The first is a card that would be fit for a special guy in your life. The papers are by My Mind's Eye.  All I did was cut out the embellishments, backed them with foam, inked around the edges, and applied them to paper.  The embellishments are by Tim Holt's Ideaologoy, and 7 Gyspies.  This card was so easy to make, it probably took less than a half an hour.  Find paper packs that already have embellishments included on the paper.  It makes it so easy to cut them out and apply them to your card.


The second card is in the shabby chic style.  I love the light pastel colors.  The  paper is by Tim Holtz.  After I cut out the cardstock I rounded the corners.  I used chalk ink around all the edges to help the different papers pop out.Then I used a simple doily that I found in the cake isle at Michaels.   I used a rubber stamp to make the thank you portion.  Then I added some Recollections swirly pearl embellishments.  I found the flowers in the iron on section for tshirt decorating at Michaels.  I believe the paper clip bling and the bling in the center are from Recollections.  


I hope you all enjoy these two very different cards.  I've enjoyed sharing them with you.  I hope your able to take some time for crafting.  Sometimes if you only have a few minutes, you can ink the edges of cardstock.  Or cut out the papers you will need.  You don't need a couple of hours, make the best of a couple of minutes here and there.  Have a great day and happy crafting!

Tuesday, September 2, 2014

My goodness it's been over a month since I last blogged.  Time sure flies so fast!  Sorry everyone, I wish I could say I was on a cruise to the Caribbean, or out exploring the beautiful mountains of New Mexico, but sadly that's not the case.  I've just been experiencing a lot of computer problems.  Unfortunately I'm still having problems.  Never, ever allow your kids to use your lap top.  I've gone through three computers in the last three years!  Oh well, such is life.

I wanted to share a card that I made awhile ago.  It's in the altered art style. I'm a huge fan of Tim Holtz, and I'm always looking for inspiration.  This card is a little like his style.


I believe the paper I used was by Die Cuts With a View.  The gears are glossy, which give the card a really different look.  Most of the embellishments are by Tim Holtz, which includes the bingo letter, the enameled number, and the game spinner.  I rubber stamped the clock, and used my die cutting machine to attach a scalloped border around the clock.  The background paper was inked around the edges, with chalk ink.  I used foam dots to help give the accents some dimension.  

I hope you all enjoy my venture into altered art.  Lately I've been working a lot with my Julie Nutting paper doll stamps, and hope to be able to share some new collages with all of you soon.  Happy crafting!

Friday, July 25, 2014

Hello everyone!   I hope your all doing great.  I can't thank everyone enough for stopping by during the Where Bloggers Create 2014 blog hop.  I hope you all enjoyed the pictures of my crafting area.  It's very cluttered, and I love it.  At least I was able to clear off my desk so you all wouldn't see how messy it usually is.

Today's project is a cute card I made with silhouettes for the main design.  I'm so in love with the style of this card, as I have always had a love for anything vintage.  I cut out the ladies with my Cricut.  I'm not sure of the cartridge, but if you all really want to know then leave a comment and I'll be glad to go through my supplies and see if I can find which one I used.


Isn't the cameo button so cute?  It's by Jesse James buttons.  I inked the edges of the card with Colorbox Chalk ink.  I hope you all enjoy this card as much as I do.  Take care, stay cool, and happy crafting! 

Friday, July 11, 2014

Where Bloggers Create:

Today I wanted to let you all know that I'm participating in a blog party called "Where Bloggers Create 2014".  It's being hosted by Karen Valentine at the website Mydesertcottage.com.  She has done this for a couple of years now, and this is the first time I've been able to participate.

I was a little leary about participating because I don't have a craft room.  I have chronic pain, and a lot of my crafting is done from my bed.  I didn't want to show you all my messy bedroom so you'll have to settle for my dining room.  My sweety installed some shelves and a custom made desk out of a metal door.  We never eat there, so it was a lot of unused space that had a lot of potential.  I've only had my desk set up less than a year now, but it is amazing to be able to leave my stuff out, and not care.  Here are some of my pictures.


The dining room chairs are some that I picked up at a yard sale for $20.00 for all four.  They looked horrible, and my family couldn't believe I brought home more "junk".  Beauty is in the eye of the beholder.  I knew I could change their look easily with paint and new upholstery.  I love the way they came out, and needless to say, my family was surprised.


The computer desk that is in the above picture was another yard sale find.  It's great for storage.  Next to it is a long dresser that I stacked more storage containers on top of. 


As you can see from the above picture, I have tons of space for storage.  The desk was made out of an old metal door that we painted dark brown.   My sweety then added wood on the edge of the door to make it look better.  I have a magnetic strip for all my tools.  Underneath my desk is another shelf.  This enables me to have more space for those hard to fit items.


This organizer is another great find.  I was on pinterest and saw this on someone's site.  This is from Harbor Freight.  I used a 20% off coupon, so it brought it down to sixteen dollars.  It was so worth it, as it spins around and helps keep my most used items where I can access them easily.


This is on the opposite side of my desk, and is under a wrap around bar that is in the middle of my kitchen.  I was really nervous about sharing my space, but then again I figured that everyone doesn't have a craft room.  A lot of us only have our dining rooms, beds, or laps.  I hope I've given all of you some ideas for storage that you can apply to your own space.  Please check out the blog hop, and I wish you all happy crafting!!!

Monday, July 7, 2014

Hope you all had a great 4th of July!  Mine was great!  Very relaxing for a change.  I've been restoring an old dresser that I found at a thrift store, and will be sharing pictures of it on here for all of you soon.  I can't believe the transformation.  Well, on with the craft project I wanted to share today.

I couldn't quite decide what I wanted to share.  It was a toss up between a card or a cute tin.  I decided on the card, and will share the tin another day.  This card I made was done with an embossing folder.  That is the part on the dress with the flowers on it.  After I embossed the design onto a piece of pink card stock, I cut out a pattern of a dress.  I then ran chalk ink along the edges and on top of the embossed flower to help the embossing pop out a little.

Then I made a clothes hanger out of a piece of craft wire, found in the jewelry department in Michaels.  If you don't want to make one, then I think Tim Holtz has some premade one's in his craft line.  I then glued a piece of lace hearts to the bottom of the dress.  I put foam dots underneath the dress and then applied the dress to a sheet of Martha Stewart's patterned paper, which I then applied to a sheet of green card stock, that I edged with chalk ink again.  I applied some pretty flowers in each of the four corners.  Last but not least, is the cute bumblebee (Martha Stewart) that I added next to the dress.  The result is a cute, quick card that a lot of women would love to receive.  I hope you all get some creative ideas, and happy crafting!


Tuesday, June 24, 2014

Hi everyone!  Hope your all surviving the heat.  Here in Arizona, were at 104 degrees today.  As they say at least it's a dry heat.  It's so much worse when our monsoon hits in July and August.  Then you ad in the humidity and it's truly miserable.  Especially if, unfortunately, like me you don't have air conditioning. I, and many others have swamp coolers that work great unless theirs humidity.  Then it's horrible.

On to the crafting!  Today I thought you all might like to see a different type of craft than what I normally post.  I've posted before on the great benefits of decoupage.  Last time I used a pickle jar.  Take a look at my previous posts, and you'll find the jar I did.

Today I decided to use a cute heart candy bowl that I got from Dollar Tree.  Can't beat the price either.  I used Mod Podge to glue down the light pink tissue paper on the bottom of the bowl. Then I cut out some really cute butterflies and a bird from designer paper napkins that I picked up at Tuesday Morning.  There are usually 2-3 layers of the napkins, so if you can, try and peel them apart to make the napkin more transparent.  If not, don't worry about it, your project will still look great.  Then I glued down the butterflies all around the inside edge of the bowl first.  Next I glued the tissue paper over the butterflies. Now you can only see the butterflies from the outside of the bowl.  Then I tried to match up the same butterflies and glued those on top of the first butterflies.  I then glued the bird to the bottom of the bowl.  Last thing I did was to take a Krylon leafing pen and inked the top edge.  I think this came out so cute.  All you need is some Mod Podge, glass, and some tissue paper, or even a magazine cut out.  Can you imagine the possibilities!!!  Your only limited by your imagination.  Give this a try.  You'll be presently surprised.  Happy crafting!!!


Tuesday, June 17, 2014

I'm such a terrible blogger!  So sorry everyone, but it's been a busy month around here.  Just got back from a great vacation in New Mexico, and didn't realize how long it's been since I posted on here.  I have been busy creating lately, so that has been great.  Can't wait to start sharing with you all some of my creations.

I've told all of you what a big fan I am of Julie Nutting.  I bought her first book called Collage Couture.  Now she has a new book (that I already ordered, and am anxiously awaiting it's arrival) called Collage Couture Studio.  I'm so in love with all of her products.  She has a paper doll line through Prima Marketing.  I think I own all of them but 4-5.  That's a lot!  Well I wanted to share a tag that I created with one of her paper doll stamps.


This paper doll stamp has a country western feel to her.  I wanted to make her a little more feminine, so I used paper from My Minds Eye for her clothes and hat.  The pinwheel is from Recollections.  I love adding kites to my creations, and this one is from Basic Grey.  The stamp with the saying on it is by Tim Holtz.  I used a cute paper doily, and added a beautiful blue bird from Martha Stewart.  I'm sure you will be seeing a lot more creations with these stamps, because they are so versatile.  You could even stamp them, then scan them into your computer to increase or decrease their size for different projects.  I hope you all enjoy my country gal, and I'd love to hear from any of you that are as addicted to these stamps as I am.  Have a great day, and happy crafting!!!!

Friday, May 23, 2014

Hello to all my crafty friends out there.  Hope your all getting ready for the three day weekend.  I'm looking forward to some crafting time.  Can't wait.  Today I'd like to share a super easy flower that I've made.  I found this terrific book called Creative Bloom, by Jennifer Swift.  he has some amazing projects made with wire and fabric. You should try and check out her book.

I used bailing wire to create the flower.  It was fun to make and didn't take too much time. I hope you all have a great weekend, and find some time to be creative.  Happy crafting.


Friday, May 9, 2014

Good afternoon everyone!  Hope all is well with all of you..  Today I'm excited to share one of my earlier projects.  This is a collage that I made a while ago that I just love.  It's been such a long time that I made this that I can't remember how I created the paper doll.  It could be a rubber stamp, or maybe a pattern I downloaded off the web.  I'm sorry, but the older I get, the worse my memory is.  If you saw my craft supplies, you'd understand how hard it would be to locate the stamp I may have used.  I'm sure some of you can relate!

Anyways, this is the very first collage that I ever did.  It's pretty simple, but I just love all the pink in it.  The skirt is just torn scraps of paper that I glued on at the top only, so the bottom is loose and free flowing.  She's holding a beaded flower in her hand.  I hope you all enjoy this latest beauty.  Happy crafting!!!  Oh, by the way, happy Mother's Day to all you mom's out there.  I hope you all get to enjoy the day with friends, and loved ones!


Tuesday, April 29, 2014

Wow, time does fly.  I've been camping in New Mexico.  What an amazing beautiful area.  I actually brought a suitcase filled with craft projects.  I even decoupaged a walking stick in camp.  That's a true craft addict for you!  Believe it or not, I actually did craft in camp.  It was truly an amazing and fun experience!  I can craft anywhere!

Today I wanted to share my artist apron with you.  I bought a canvas apron at Michaels.  I then decided to spray it with Dylusions spray ink.  I put down a doily stencil, alphabet lettering stencils, a banner stencil, and a honeycomb stencil.  Then I sprayed the inks on top of it.  I used a lot of bright colors, and tried to let them dry between each color.  I then stenciled a couple of birds on top of that.

Then I cut out some butterflies out of fabric, and glued them down with fabric glue.  This particular apron didn't have any pockets, and when I'm working I really need pockets to help control my crafting messes.  I had gotten some cute fabric a long time ago, at Hancock's, and thought it would be adorable on the apron.  I was right.  I then sewed on the fabric, making pockets for even more organization.  As you can see below, it turned out so cute that I don't want to wear it.  I don't think the inks I used are washing machine proof, but that didn't matter to me, because I doubt if I will ever wash it.  I used Tim Holt's tattered angel die to create a flower on the top of the apron.  I put a button in the middle of the flower.  It's a messy flower, but that is the charm of it.  I hope you all enjoy this cute and easy project.  Happy crafting!


Monday, April 7, 2014

Exciting news!!!  I've been published!  I can't believe it!  It's the first time I've submitted my stuff into any magazines, and they actually published two of my steampunk creations!  This is the magazine (Volume 3):


I'm on page 79, and page 89.  These are the two projects I have in there:  


I found the gear at Target, and had no idea what I was gonna do with it.  So glad I decided to make it a steampunk theme.  I'm in love with steampunk, and someday hope to sew my own steampunk clothes!  The paper's are from Graphic 45.  I love their stuff!  The flying man is a Lost Coast stamp.   My first project with the flying man actually had a full page spread!  So amazing!!!!!  


These are pictures that I took of my projects.  The pictures in the magazine are just amazing!  You can't tell from the pictures, but the notebook project is actually a composition book that I used a rusting technique on.  I love the feel of it.  

I can't tell you how excited, thrilled and shocked I am.  Now I want to send in some of my other projects to different magazines!  I'm just on cloud nine, and don't want to come down.  

Tuesday, April 1, 2014

Hello everyone!  I hope all is well with you guys.  I'd like to share a neat project that I did involving a wine crate that I found at the thrift store for only $3.00!  I decided to leave the outside the way it was since it was such a beautiful color of wood.  This is a side view.


I decided to use Tim Holtz's paper tape to cover the side walls and edges.  This covered great, and was really easy to apply.  Even if I messed up, it was easy to peel off and do over.  Then I used a variety of paper tape as a background in each cubby.  I'm not sure of the manufacture of the tapes, I know some of them were made by Recollections.


Here are some close ups of the cubbies.  I just love all the cute things I had laying around.  I couldn't tell you where I found all of the items, some are Avon, some are from the dollar store.  The mannequin image, the sewing machine, and the pin cushion is by Hot off the Press.  Some of the other items are from the miniature section of my local craft store.  Whatever I could find, I threw them it in.  This is a close up of the top half:


This is a close up of the bottom half:


I hope you all enjoyed this project, I know I had a blast making it.  Give the washi (paper) tape a try.  It's amazing stuff, and you'll love it.  I just noticed how cute this looked along side my blog design.  It just kinda blends in.  Happy crafting!!!


Friday, March 21, 2014

Hi everyone!  Hope all is well for you guys.  I've been busy this week working on doodling, and making St Patrick's Day cards for the grandkids.  I thought I'd share the cards with you.  I tried to use images that reminded me of each grand child.  For the youngest, I tried to only use things that he couldn't pull off easily. Here is the one I made for the ten month old.  I used extra glue on the flowers to make sure he can't pull them off.  Sorry for the shine on the picture.  I'm still learning the best way to edit them, and it's not always easy when your self taught!


The next card to share with you all is for my beautiful granddaughter.  This card is something she'll love because the little girl looks like her.  I love the white scrolls and pink flowers made by EK Success.  They remind me of cake decorations.


The next card is for the oldest grandson.  He loves animals, and this just reminded me so much of him.  I used the same scrolls as I did on the other card, just turned them differently.  I colored all the cards in with colored pencils, and could have worked a lot longer on blending them in, but was in a hurry to get them out. They don't care anyways.  Their just so excited to get their cards.  


I hope you enjoy the cards, I know the grandkids will be thrilled to get them.  Have a great weekend, and happy crafting!


Friday, March 14, 2014

OMG!  Another two weeks have flown by.  I really was trying to post more on my blog, but I seem to be failing.  Sorry guys, I'll keep working on that.  I wasn't sure what to share today, but I thought you all might like to see something a little different that I made. 

Today I'm excited to show you all a beautiful wreath that I made with some paper flower embellishments made by K & Co.  They come in a paper pad and there are beautiful flowers, leaves, and playful trendils that are flat.  I like to fold them, and crimp them to give them some dimension.  I bend the flowers many different ways, and layer them with an assortment of styles and colors.  The more crazy the combinations seem to be the more great the flowers turn out.

First, I started out with a piece of pipe insulation from Home Depot.  This is in the plumbing section.  You use it to wrap your pipes to prevent them from freezing.  They look like this:


Then I took some plastic tape and joined the two ends together to make a wreath.  It looked like this:


I decided to wrap some muslin around the wreath just because I didn't want to see the black foam through the flowers.  I just ripped the muslin in strips, then added a little glue here and there.  Next came the flowers.  I love the pastel colors they come in.  This paper pad of flowers from K & Co. are just fantastic!  I found the flower pad on clearance at Target.  I barely made a dent in the package, so I have a ton left for many more projects.  These would be great on cards because you can still send them in the mail, because although their dimensional, they can still lay flat for easy mailing.  I attached some brads from Recollections to add a little bling.  Then I used a hot glue gun to attach the flowers.  Enough of the suspense, here is the finished wreath:


Well, that's about it for now.  I hope you all enjoy this beautiful wreath as much as I enjoyed making it.  Have a great day, and happy crafting!


Thursday, February 27, 2014

My goodness it's really been almost two weeks since my last post.  Time flies when your having fun!  Wish I could say I've done something exciting to report, but no such news.  I've just been watching craft videos and learning how to do a different type of collaging that I haven't done before.  I'm taking a class with Cathy Bluteau that's called 21 Secrets of Doodling.  I'm having a great time doing the techniques, and soon I'll post a picture of the collage that I've done.  You can find her classes at Cathyb.typepad.com.

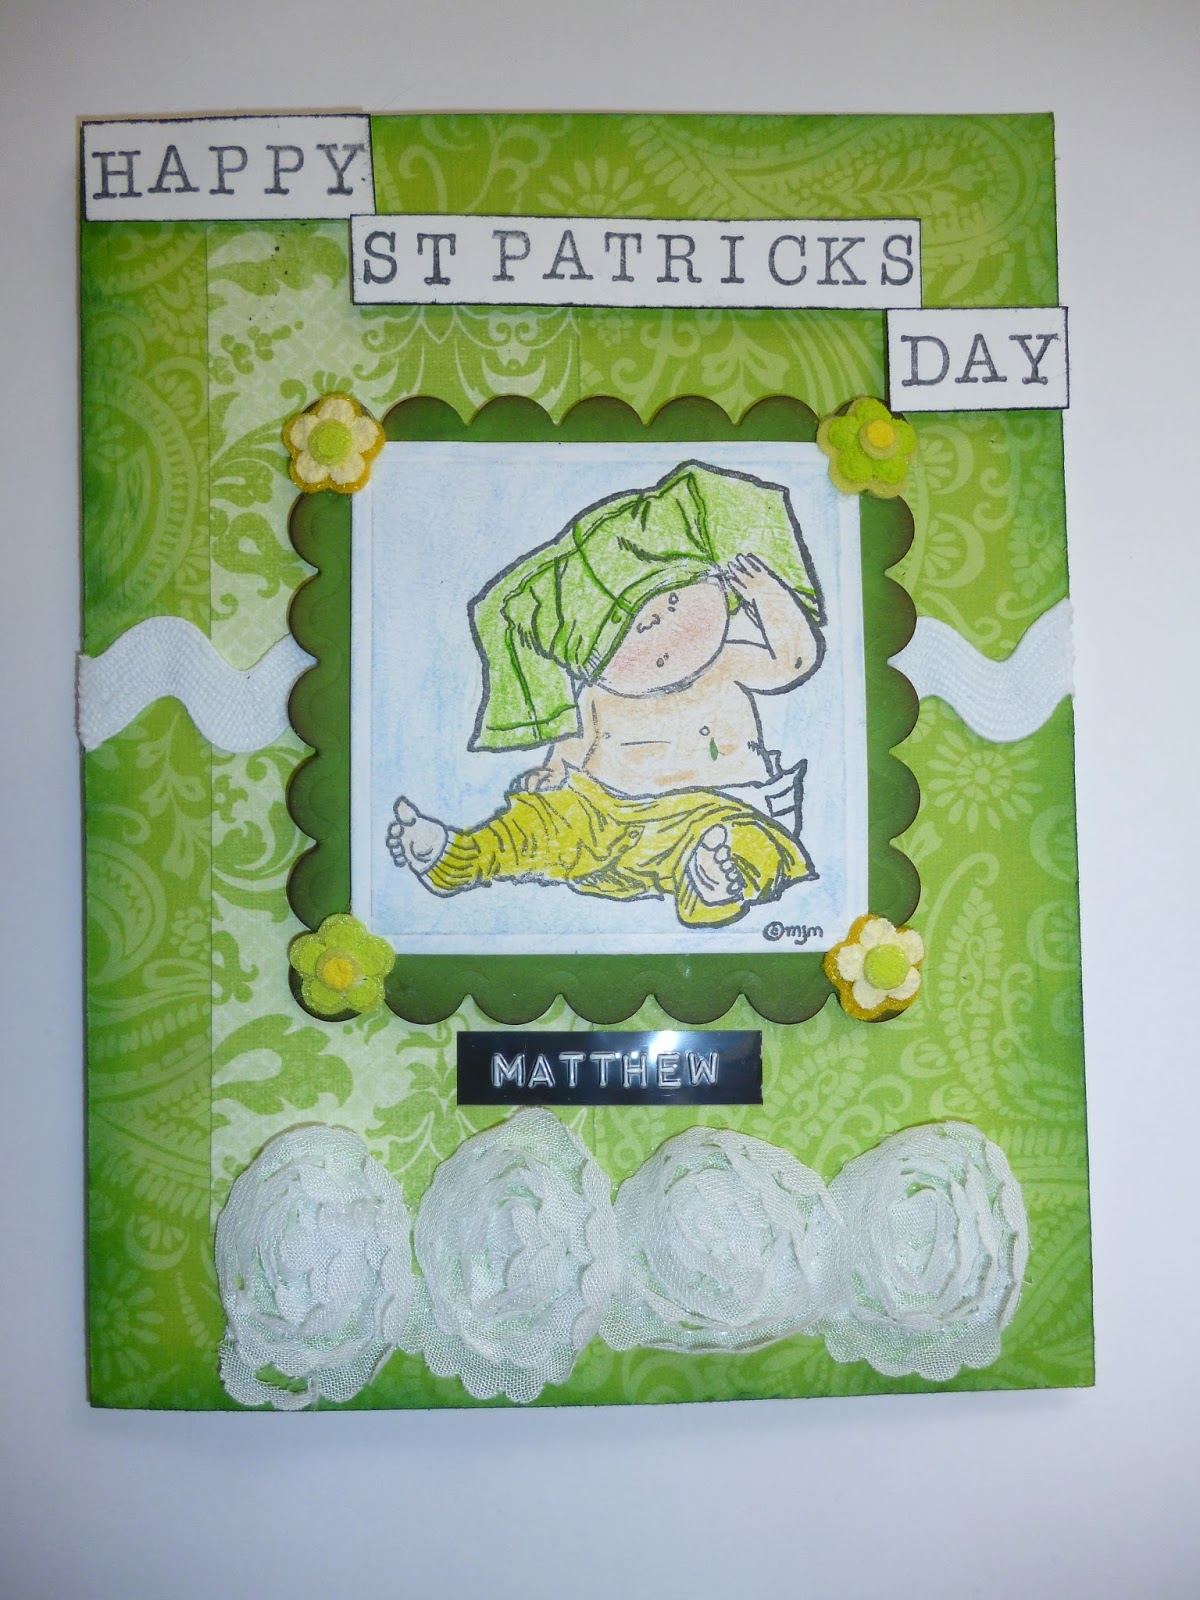
Well today I'd like to share a really sweet collage of a couple of ladies that are stamps from my favorite artist Julie Nutting.  The stamps are made by Prima. She has some new stamps that I'm hoping will arrive soon, but these stamps are from the first line she did last year. If you've looked through some of my old posts, you'll find that I've used some of her stamps on other projects already.  I've fallen in love with them, as I'm hopelessly obsessed with paper dolls.  Maybe it's because I was such a tomboy when I was younger.

This collage was made on an 11x14 canvas.  I used flexible modeling paste to put the honeycomb designs on.  Then I also used a stencil by Stencil 1 to apply the flexible modeling past to the tree.  I just mixed in a little brown paint into the modeling paste.  Then I sprayed the canvas with different shades of spray mists.


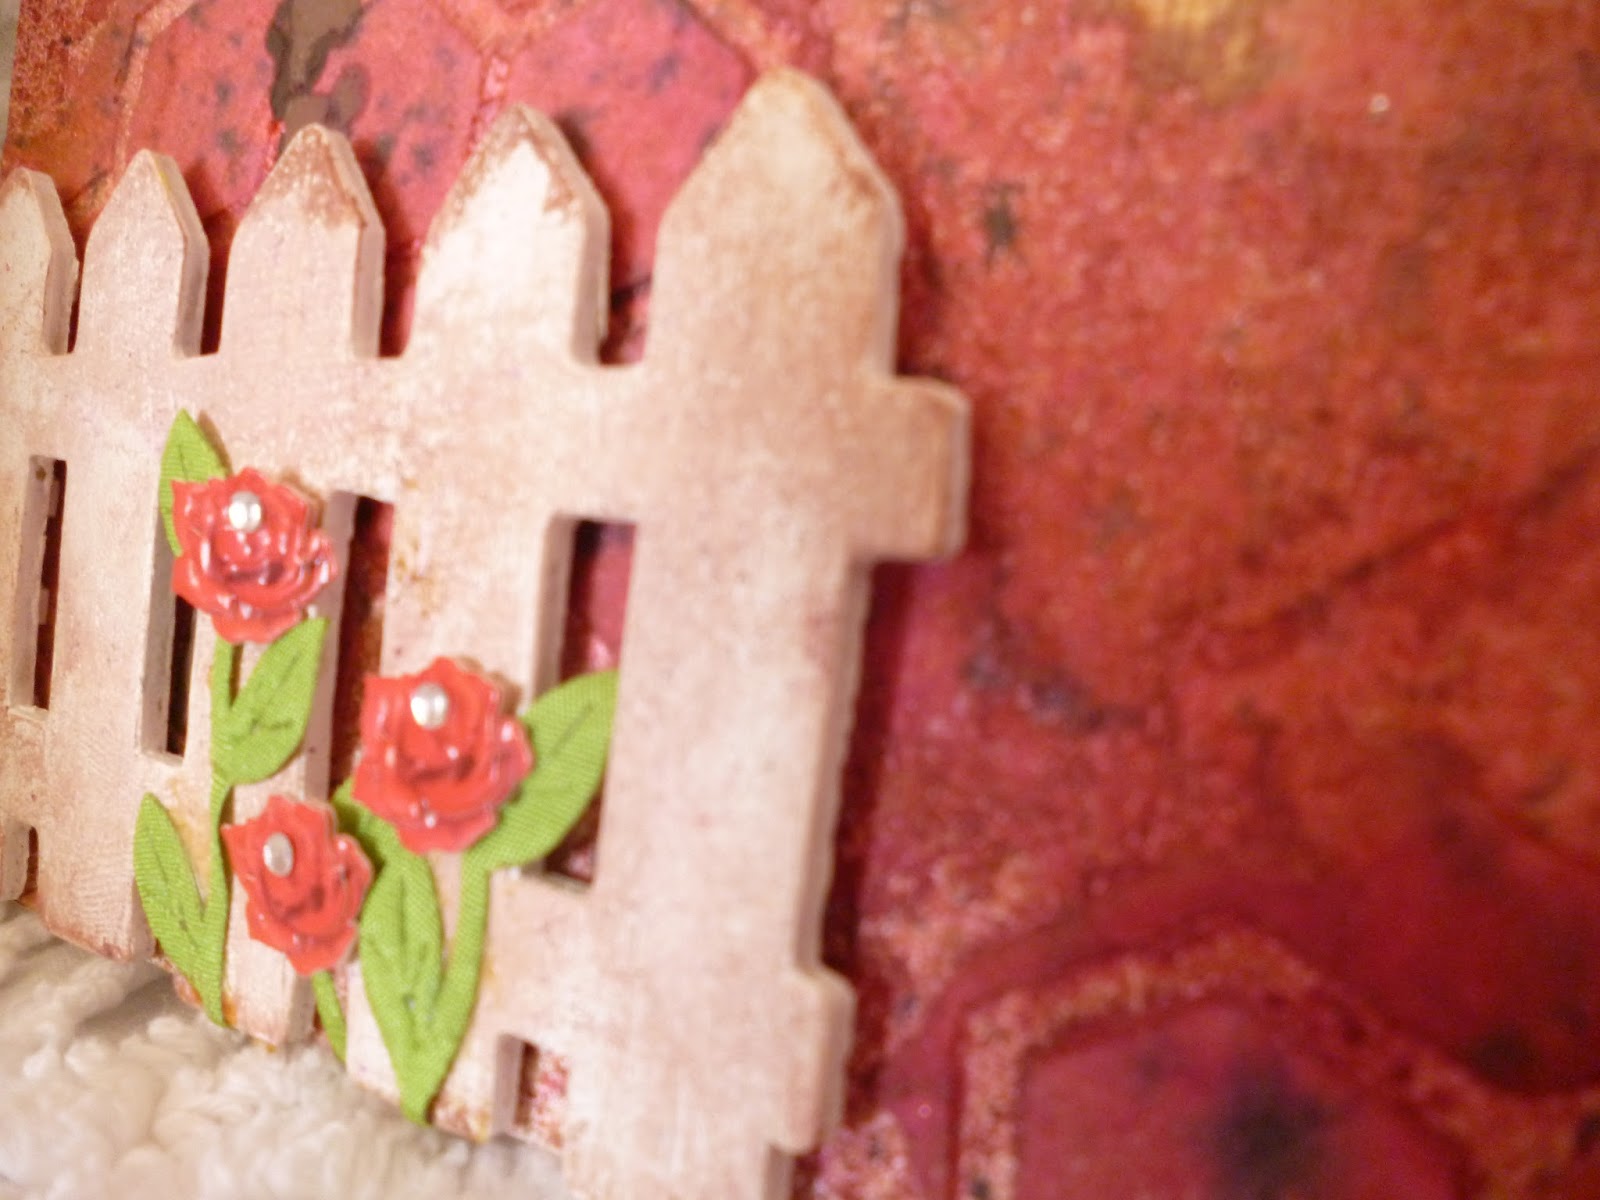
After I got the colors where I liked them, then it was all about the embellishments.  I used a wooden fence that I found in the wood section in Michaels, painted it white, and dry brushed some brown acrylic paint to make it look a little older.


In this side picture you can see that I attached foam dots to the fence to make it pop off the collage. 


 I then applied some cute dimensional butterflies by Recollections.  Next I  applied the wooden pieces.  On top of the bird house I used a ball chain from Tim Holtz's collection.  I just layed down a line of thick tacky glue and set the chain on top.  The mushrooms were wood pieces that were the same color as all the other wood embellishment, but I wanted them to look more real.  I used acrylic paint to change their color.  Don't be afraid to alter items, it's only paint.  You can always keep trying different paint colors to see which ones you like the best. As you can tell these wood pieces gives it a lot of dimension.  


I then rubber stamped the two girls onto white cardstock, and then paper pieced the patterned paper by My Minds Eye for their clothes.  Then I colored in their skin tone with Copic markers.  I used a watercolor wash to create color on their cheeks.


 I think this came out so cute.  I'm so in love with these stamps, that I'm sure you'll be seeing a lot more of them in my other projects.  I'll be checking the mailbox daily to see if my other stamps came in yet.  I hope you all enjoy my collage, and happy crafting!


Friday, February 14, 2014

Happy Valentine's Day!!!!!  I hope your all taking time to let the special people in your lives know how much they mean to you.  I thought today I'd share a couple of Valentine's Day cards I made for the Grandkids, and an extra one just for that special someone in your life.

This card is one I made for my beautiful granddaughter.  She's 4 years old, and loves anything Disney.  I fell in love with the cute ribbon at the top.  I'm sorry the picture is so dark, that's what happens when you wait until the morning your mailing the card to photograph it.  I know she will love it, and I loved how fast it was to make.


Next is the card I made for my 6 year old Grandson.  He's always moving a mile a minute, so the bike and skateboard were perfect for him.  I like that I used something different, not just Valentine's images.  Since he's 6, I didn't want to put a lot of stuff on his card, so I kept it simple.


The next card I'd like to share is for my 9 month old Grandson.  I didn't want to put on anything small, so these felt owls were perfect.  I used extra glue to seal the felt shapes on better.  I have no doubt that he'll try and taste it, and I didn't want anything to be able to be pulled off the card.  


You'll notice the simplicity of these cards, the little ones just aren't interested in all that stuff, so I try and keep the embellishments to a minimum.  

Last but not least, here's my card for a significant loved one.  I didn't notice till just now that my ribbon is crooked.  Oh well, they'll never know.  Sometimes you just have to let go and embrace the imperfections.  I used Martha Stewart's punch all over the page punch.  It really looks beautiful in person.  The embellishments are from K & Co.  The heart doily is from the dollar store.  This card took me longer to make then the others, but I just love all the different layers. Have a great Valentine's Day and I hope you all get to be spoiled by someone you love today, and happy crafting!


Friday, January 31, 2014

Well so far it's been a successful event of the Grow Your Own Blog party.  I've gotten many new followers, and I hope to get some more.  It's amazing to realize how many craft addicts there are out there.  Thanks everyone for your nice comments.

I'd like to share a couple of cards that I made because of my love of mannequins, and sewing related things.  I just love anything to do with corsets, or mannequins.  I made these cards with plain kraft cardstock, and with Tim Holtz's sewing die cut.  I cut out two images of the same mannequin, and then just cut them in half to change up the die cut.  I also took acrylic paint and brushed it onto the card stock in a dry brush mode.  For those of you who don't know how to do that, all you do is dip your brush into paint, then wipe most of the paint off on a paper towel.  Then apply it randomely to the card stock.  I punched out the leaves, and applied some paper flowers in the corner of one of the cards.  Then I rubber stamped the saying onto a round circle.  I used a plain white die cut to make the mannequin look three dimensional.  I applied foam dots to the back of the die cut to make it pop out.  I then applied a doily and added my saying with foam pop dots..


On the other card, it's done pretty much the same, I just added some chalk ink around the edges of the die cut.  I applied a white doily and topped it with two round circles.  Next I cut out the spools from the same die cut, and wrapped them with floss.  The scrolls were cut with my Cricut I believe.  I decided to add a stick pin in the back of the spools.


These designs are very simple and easy to recreate.  I used premade flowers this time, but a lot of times I'll make my own.  One of these days I'll teach you all how to make some paper flowers.  I love to make roses. I hope you all enjoyed these cards as much as I enjoyed making them.  Happy crafting!


Friday, January 24, 2014

"Grow Your  Blog"

Today I wanted to share with you all a blog party that I'll be involved in called "Grow Your Own Blog Party for 2014".  Since I'm a new blogger, this should be a great opportunity to get my blog out there for more people to enjoy.  Hello, my name is Kathy, and I'm a craft addict.  There, I've said it.  The first step is, admitting that you have a problem.  I'm sure there are plenty of you out there who know what I'm talking about.  That's why I decided to start a blog.  I'd love to have more followers, so please feel free to join.  I can also be reached at my email address at DKLuckyM13@aol.com.  I also have a pinterest page at pinterestdkluckym13/.

I love so many different types of crafts, such as mixed media, paper dolls, steampunk, card making, crocheting, collage, sewing, any type of paper crafting, altered art, embroidery, jewelry making, polymer clay, quilling, drawing, and art journaling, just to name a few.  See what I mean about that addiction thing.  I'm so excited to be meeting some new friends, as I hope we'll become.  Please take the time to visit more of the great blogs out there, I know I'll be visiting quite a few.  I was hoping to put up their badge on the side of my blog, but I'm still new to blogging, and can't quite figure out how to add it.  The web address of the "Grow Your Blog" is at vicki-2bagsfull.blogspot.com.  I hope you all sign up to be my followers, if I can get 100 new followers, I'll have a free giveaway.  Everyone loves free stuff!  Thanks guys and happy crafting!!!


Tuesday, January 21, 2014

Hello crafty friends!!!  I hope your all having a fantastic day.  Today I wanted to share a collage that I created for a dear friends daughter.  She's 16, and I felt that she might need some positive affirmations during those tough teen years.  I created this collage by doing a base coat of mod podge and old pattern tissue.


The next thing I did was to add some Faber Castell gelato's color, by rubbing the color all around the piece.  Then I took my fingers and just smeared them all together.  I like it to look very messy.


I used all different colors randomly and didn't try to make any sense of it.  I then rubberstamped all over the piece with Stazon ink.  Then I like to take bubble wrap and apply paint with a brush to the bubble wrap, and then apply the bubble wrap to the canvas.  I like there to be tons of layers on a piece.

My next step is to use Flexible modeling paste applied to a brass stencil that I taped down on the corners to add some dimensional flowers.  Once that dries I like to apply chalk ink to the top of the stencil to color it.  Sometimes I add stickles glitter on top of that.


I then added some cute doiley stencil's by Martha Stewart to the other corners with white craft paint.  I also took the lid of the bottle of paint applied paint to it and applied that to the canvas as well.


I next like to apply rub ons all over the canvas.  For Sarah's art piece I added all inspirational quotes to inspire her to believe in herself.  After all that base stuff is done with it's time for the embellishments. I made the flowers with various craft punches.  The angel is from Christy Tomlinson's She Art Girls class that she has on her website.  I'm so inspired by all of her fantastic knowledge, and am so grateful that she is willing to share that wisdom with her fans.  I hope you all enjoy Sarah's art piece, I know I loved creating her.  Have a great day, and happy crafting!